Hey guys! It's been a while since I've done a tutorial, but the Electric palette from Urban Decay has inspired me again :) So let's stop the chit chat and get started! All the products I use will be listed as I go.
First start off with a clean eye and prime with an eyeshadow primer. I used Urban Decay Primer Potion. Then you want to use a white cream base to make these bright shadows pop. I used NYX Jumbo Eye Pencil in Milk.
Then I added Freak to the eyelid with a flat shader brush. Do not go above the crease with this color.
Next I added Thrash to the inner corner and blended it into Freak.
Next I added Gonzo to the outer third of my eye. This picture will be before I blended it.
And now taking a clean fluffy brush, I blended Gonzo in Freak and added color and blended over and over until I was happy with the saturation.
Then I took Urban on a small pencil brush and mapped out where I wanted the color and then I took another clean brush and blended it upward towards the browbone.
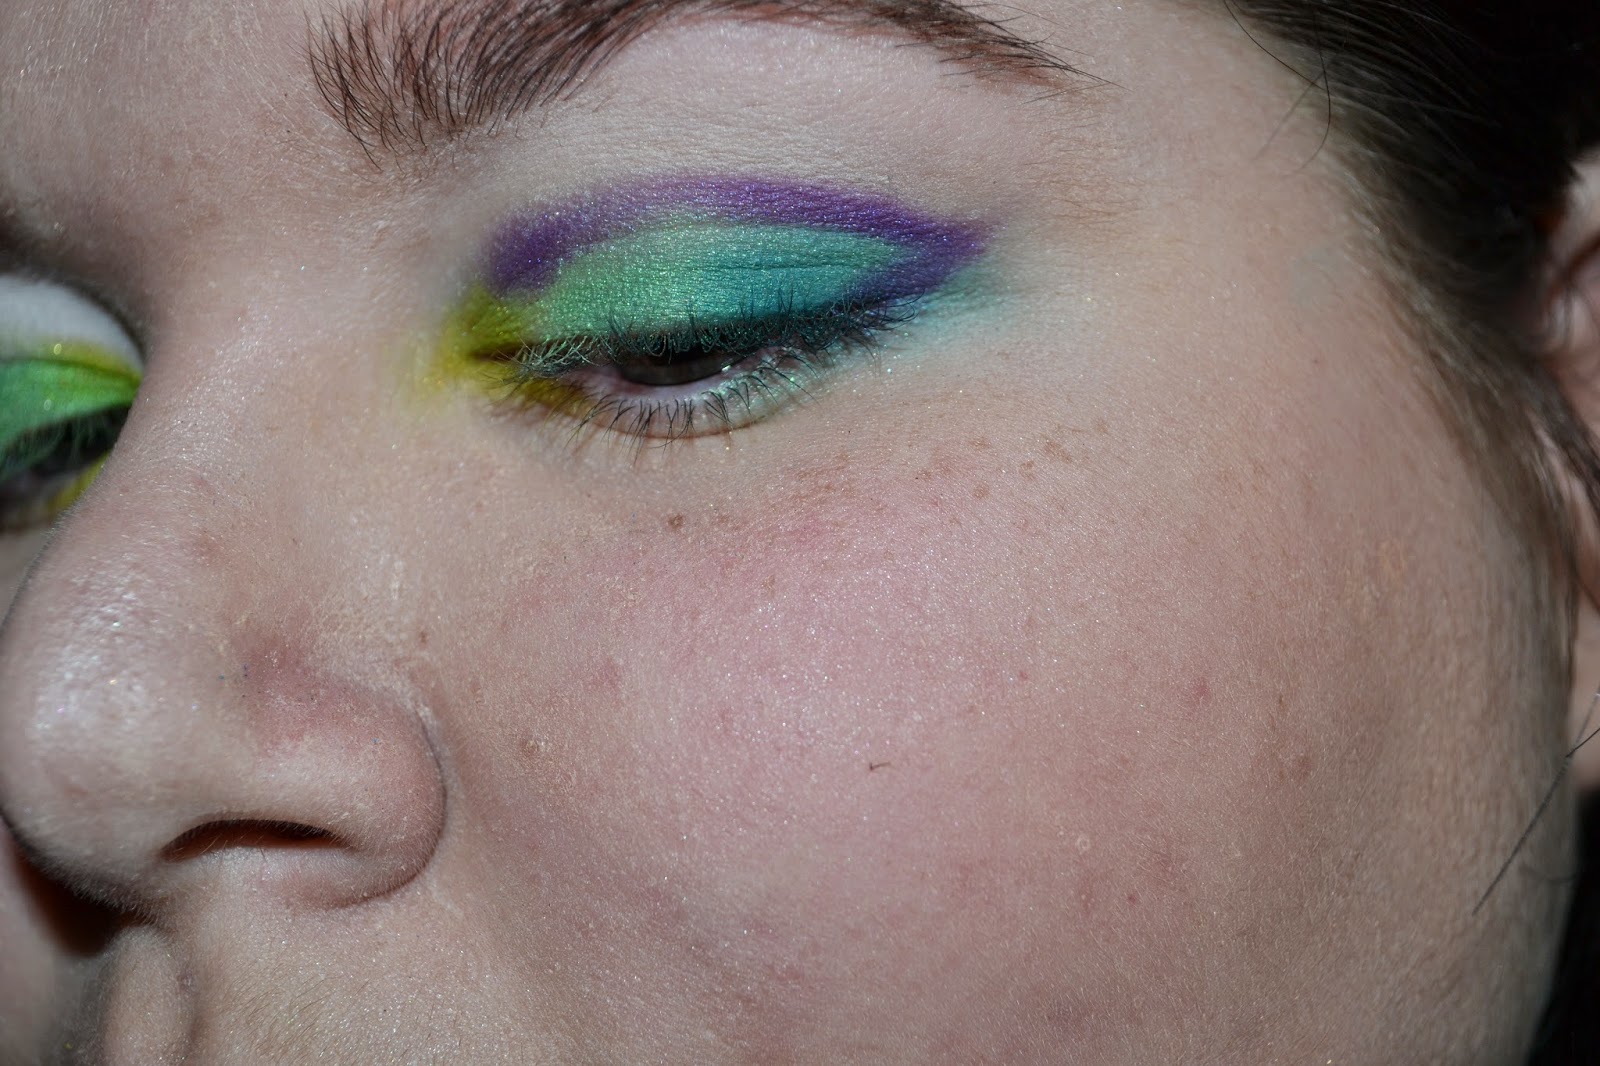
Taking that same blending brush, I picked up a little of Jilted and blended that into and a little above Urban.
Next on an angled brush I put fringe on the outer half of the lower lash line.
And then I took Freak and put it in the middle of the lower lash line blending it into Fringe and Freak.
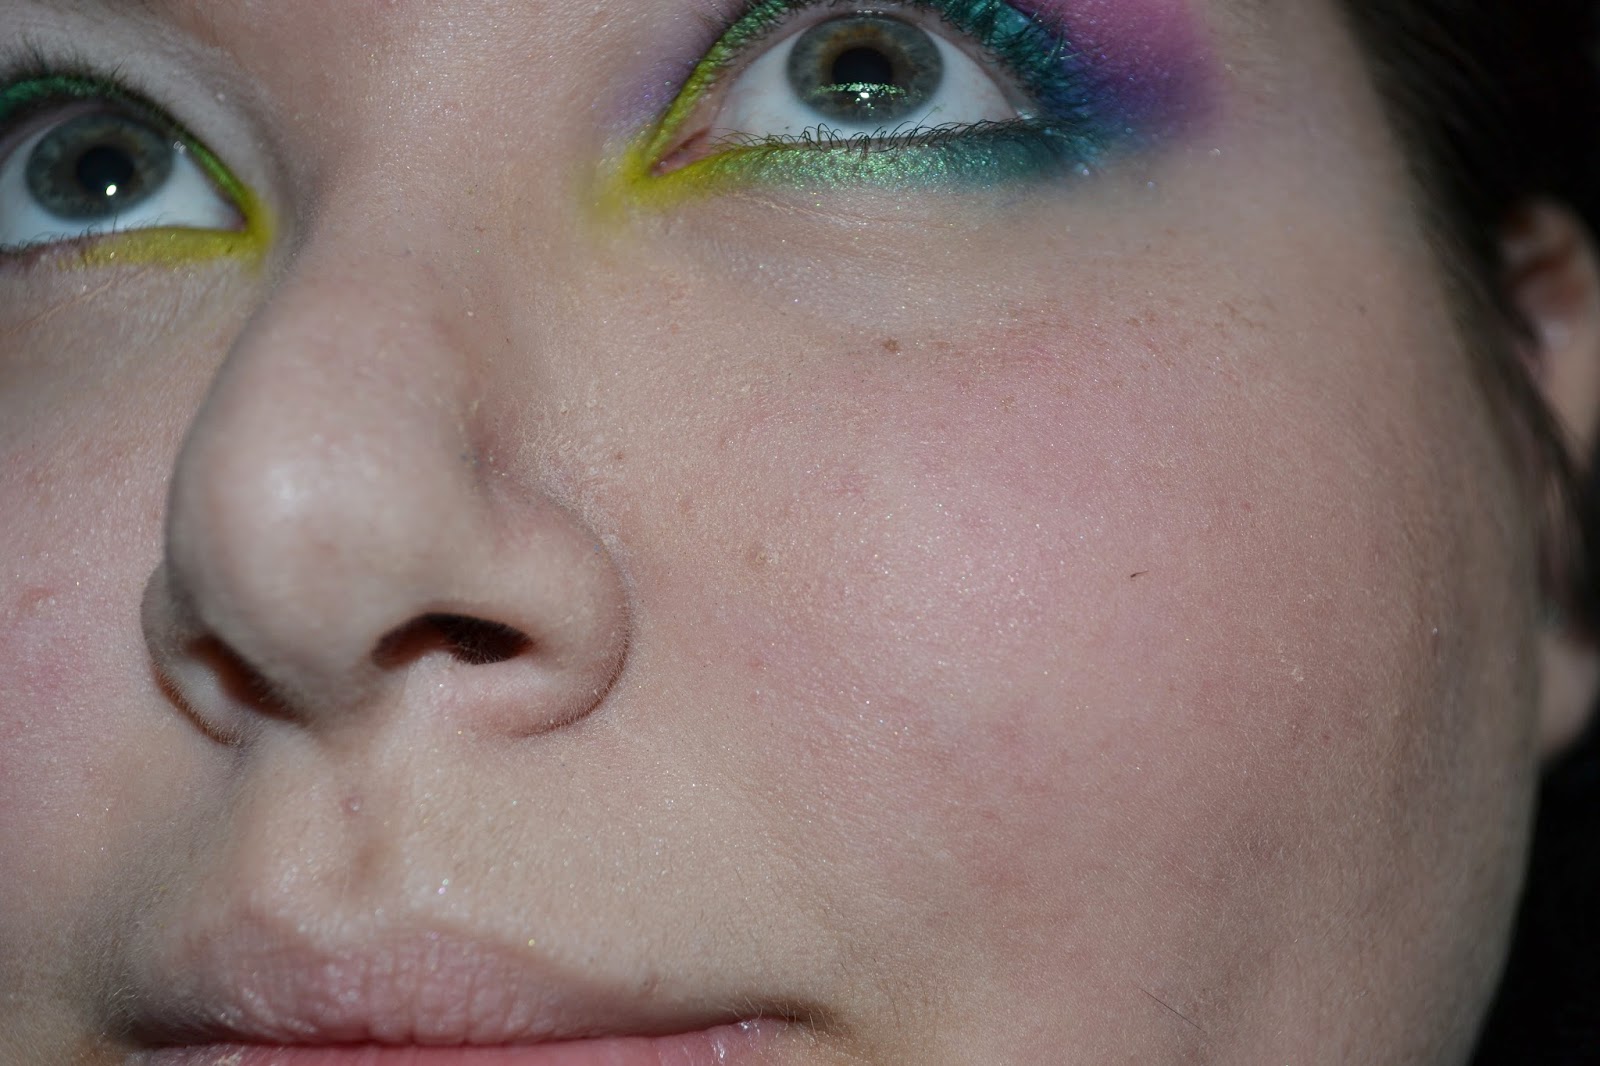
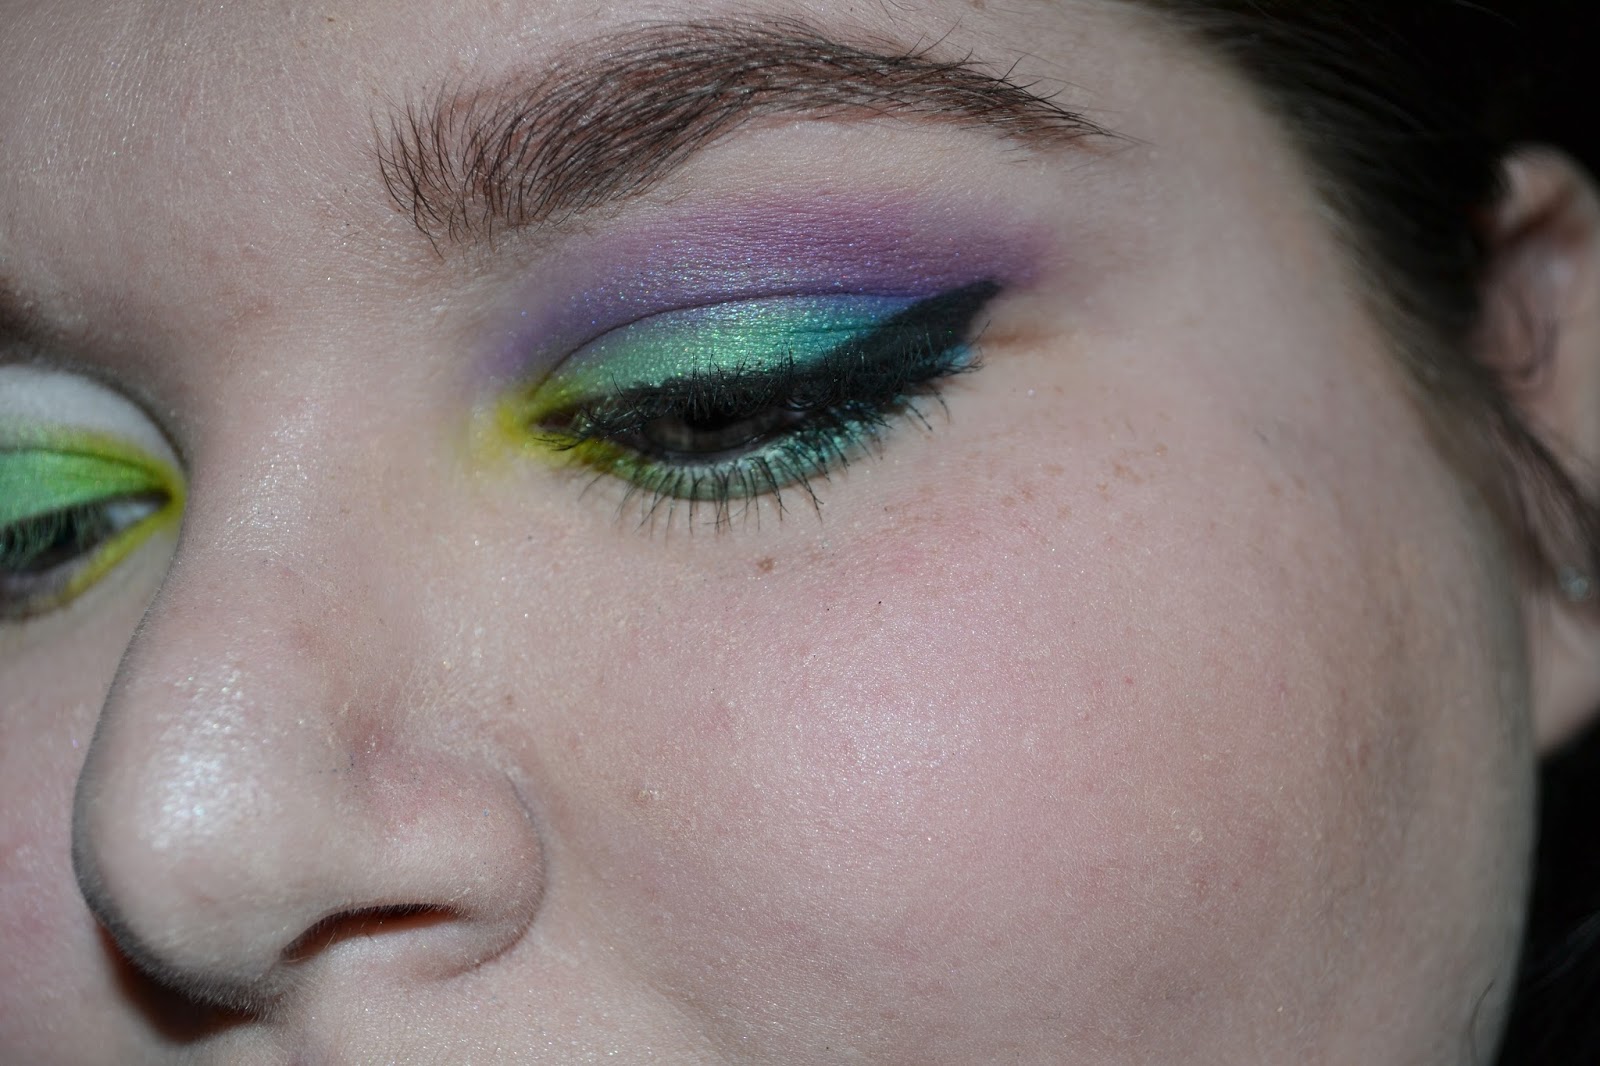
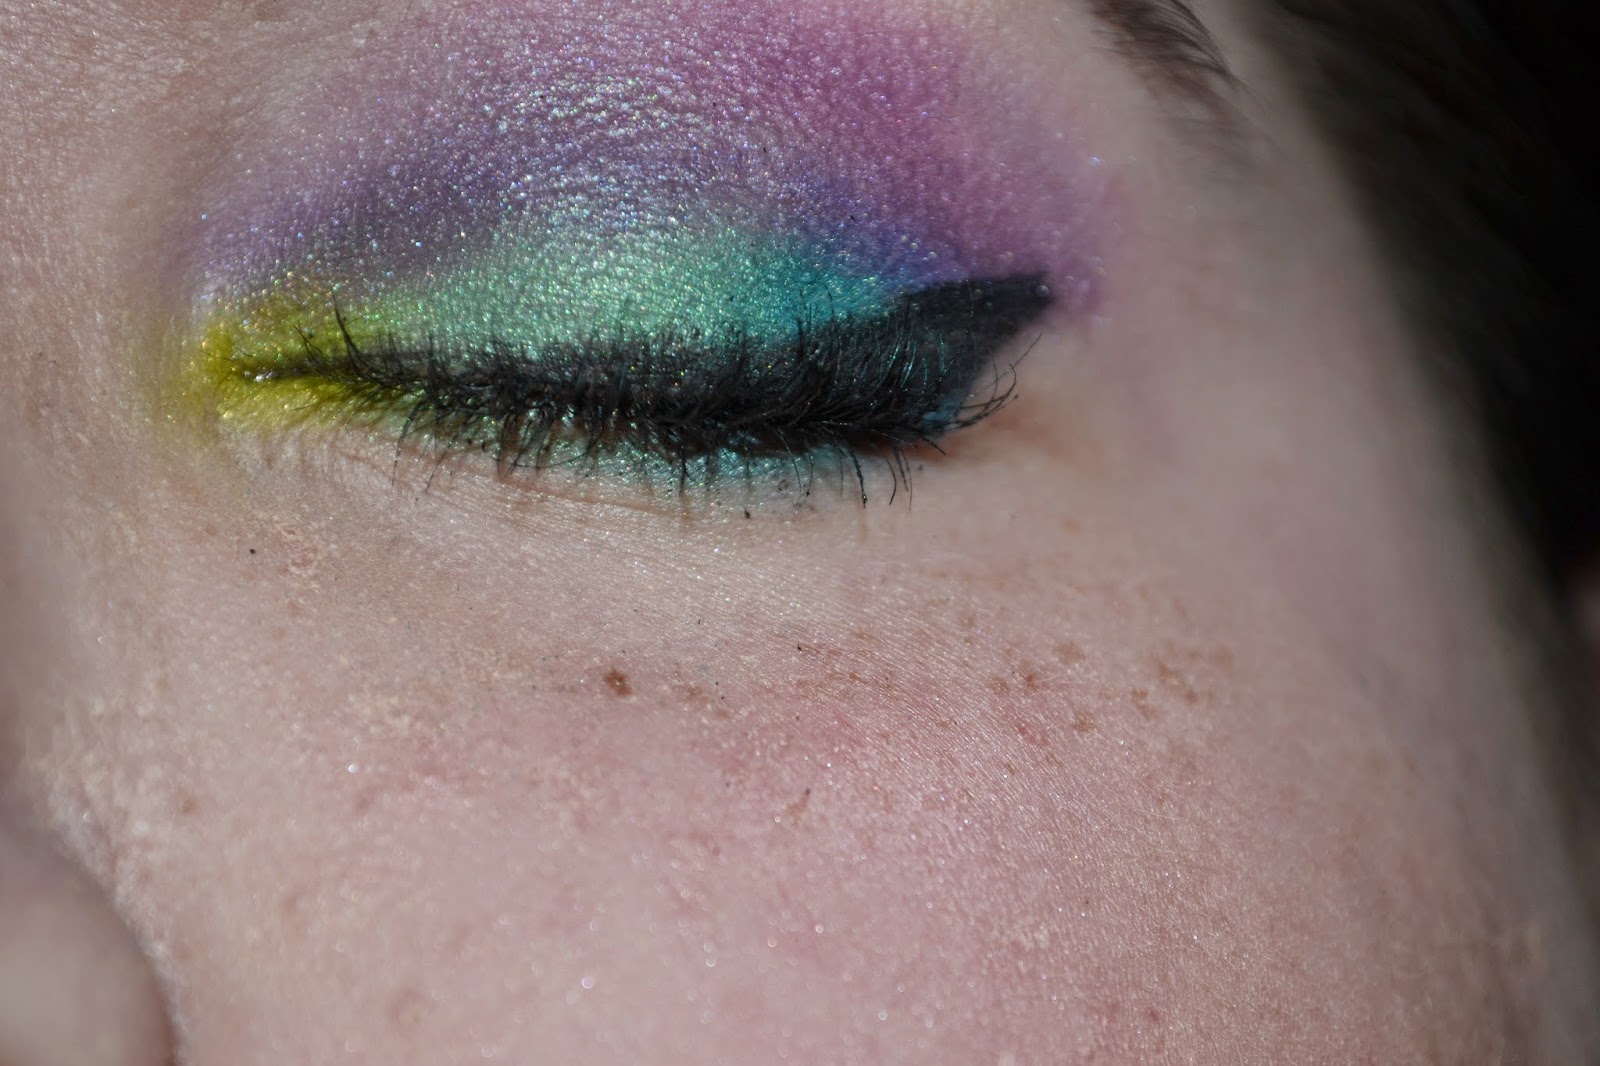
After adding some final touches like gel liner on the upper lash line, mascara, and bright pink lipstick, you are done! Here are some pictures of the finished look.
Thanks for reading!
Just a southern girl blogging about her obsession. Contact info: Twitter - @mmaegantubbss Email - maegantubbs@gmail.com
Showing posts with label nyx. Show all posts
Thursday, May 29, 2014
Urban Decay Electric Pressed Pigment Palette Eyeshadow Tutorial
Labels:
blend,
bright,
electric,
eyeshadow,
fun,
makeup,
marc jacobs,
nyx,
palette,
pressed pigment,
Tarte,
tutorial,
Urban Decay
Sunday, November 10, 2013
Autumn Eyeshadow Tutorial
Hey guys! I'm here today with a autumn/fall tutorial. Fall is my favorite time of the year and I love all the makeup looks that come with it! So here is my everyday autumn makeup :) Products will be listed below. Let's get started!
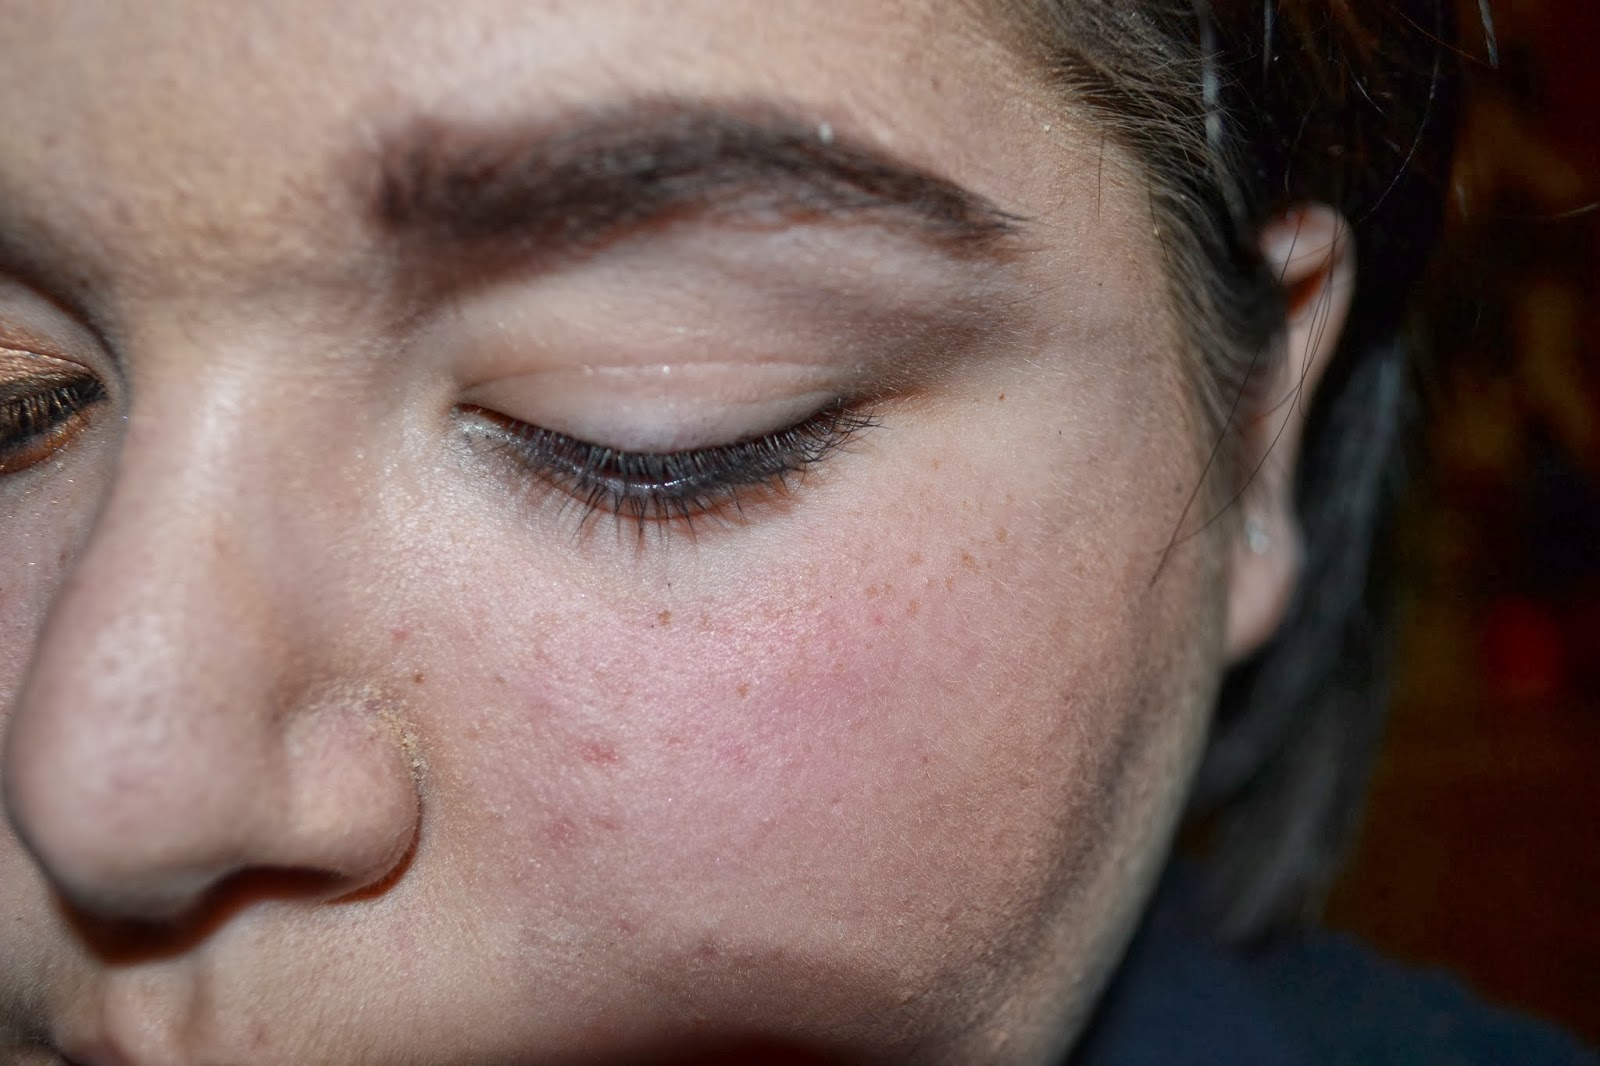
First prime your eyelid with a primer. Then cover your lid with a cream or pencil liner that is a light gold color. I used an eye pencil.
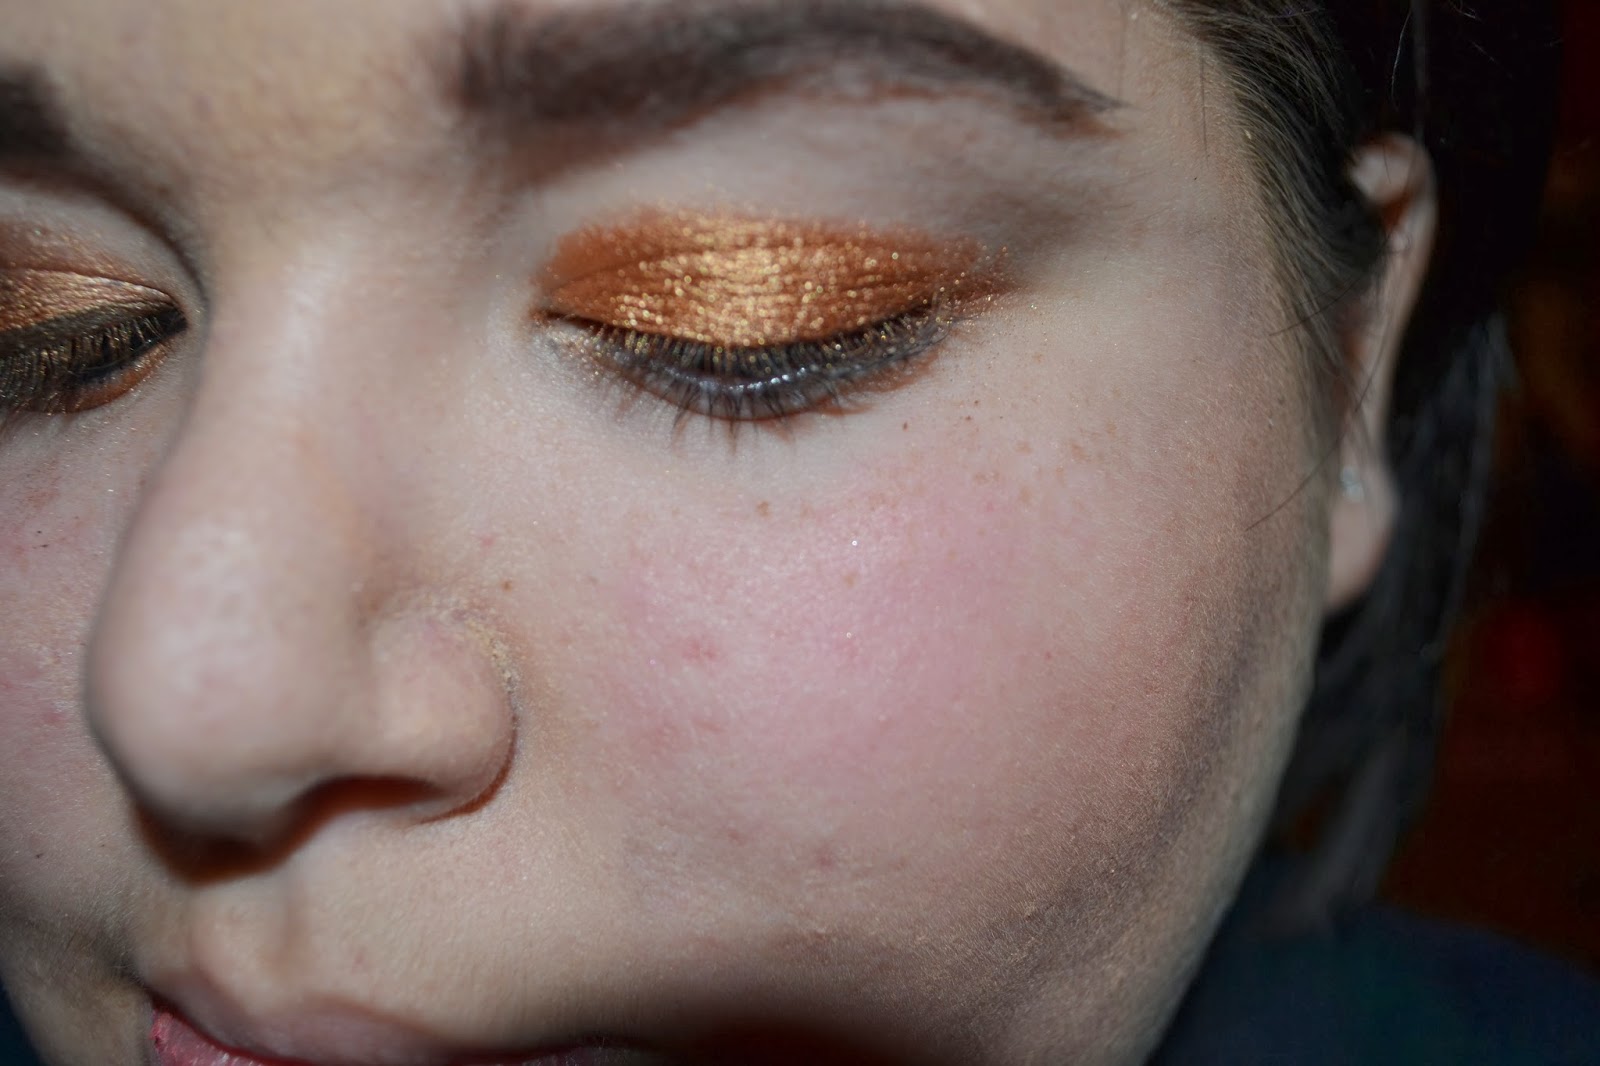
Then put a gold eyeshadow all over your lid.
Then add a matte orange to the outer 3rd and then blend a dark purple in the crease.
Next add the dark purple on the lower part of your lashes and only to the outer corner to the middle and at the middle blend the light gold to the inner corner. Finally add a matte cream color as your highlight on your brow bone.
After you add gel liner to the top lash line, black pencil liner to the water line, and mascara you're done!
Thanks for reading!
Products used
Opened. Eyeshadow used are in orange boxes
First prime your eyelid with a primer. Then cover your lid with a cream or pencil liner that is a light gold color. I used an eye pencil.
Then put a gold eyeshadow all over your lid.
Then add a matte orange to the outer 3rd and then blend a dark purple in the crease.
Next add the dark purple on the lower part of your lashes and only to the outer corner to the middle and at the middle blend the light gold to the inner corner. Finally add a matte cream color as your highlight on your brow bone.
After you add gel liner to the top lash line, black pencil liner to the water line, and mascara you're done!
Thanks for reading!
Products used
- LORAC Pro Palette
- Covergirl Clump Crusher mascara
- NYX Jumbo Eye Pencil in Cashmere
- Urban Decay 24/7 Glide On Eye Pencil in Perversion
- Urban Decay Eyeshadow Primer Potion
- MAC Saffron Eyeshadow
- Maybelline Gel Liner in Espresso
Opened. Eyeshadow used are in orange boxes
Monday, September 30, 2013
Lorde "Royals" Makeup Tutorial
Hey guys! I'm here with a makeup tutorial on Lorde's makeup in the music video "Royals". I LOVE that song. Products will be listed below, so let's get started!
First prime your eye and use a light beige shimmery eyeshadow all over your lid.
Then add a black line on your lash line using a black gel liner, but don't extend it up yet. I like gel liner because it gives you more precision.
Then make a small line extending towards the end of your brow and go up to your crease.
Then follow your crease halfway with this line. That probably made no sense. Just look at the picture.
Now soften it up with a matte black. I just followed the lines with this color.
Add some mascara pink lipstick and you're all done!
Thanks for reading!
Products used
Opened
First prime your eye and use a light beige shimmery eyeshadow all over your lid.
Then add a black line on your lash line using a black gel liner, but don't extend it up yet. I like gel liner because it gives you more precision.
Then make a small line extending towards the end of your brow and go up to your crease.
Then follow your crease halfway with this line. That probably made no sense. Just look at the picture.
Now soften it up with a matte black. I just followed the lines with this color.
Add some mascara pink lipstick and you're all done!
Thanks for reading!
Products used
- Urban Decay Naked Basics Palette (Venus and Crave)
- Maybelline Eyestudio Gel Liner in Espresso
- Maybelline Falsies Flared Mascara
- MAC Lipstick in Snob
- NYX Soft Matte Lip Cream in Tokyo
Opened
Labels:
black,
eye,
eyeliner,
lash,
lips,
lorde,
mac,
maccosmetics,
makeup,
mascara,
Maybelline,
nyx,
royals,
tutorial,
Urban Decay
Friday, September 13, 2013
Smokey Purple Eye Tutorial
Hey guys! I'm here today with a deep purple smokey eye tutorial. The products will be listed down below :)
Final Look
Now let's get started!
First prime your eye and use a white base.
Then add a dark purple to the lid. Don't go above the crease with this color.
Now blend a black in the crease with a small precision brush. Try to keep the shape that I did which will make a soft cut crease. Go all the way down to the inner corners with this color.
Then with a flat shader brush, add a light purple to the very center of your eye.
Then I lined my upper and lower lash line with the same black eyeshadow. Then I added black pencil liner to my waterline and mascara.
Thanks for reading!
Products used
Final Look
Now let's get started!
First prime your eye and use a white base.
Then add a dark purple to the lid. Don't go above the crease with this color.
Now blend a black in the crease with a small precision brush. Try to keep the shape that I did which will make a soft cut crease. Go all the way down to the inner corners with this color.
Then with a flat shader brush, add a light purple to the very center of your eye.
Then I lined my upper and lower lash line with the same black eyeshadow. Then I added black pencil liner to my waterline and mascara.
Thanks for reading!
Products used
- Ariel Palette (Sea Witch)
- Two Faced Romantic Eye (Cut the Cake, First Dance)
- Maybelline Flasies Flared Mascara
- Maybelline Line Express Eyeliner
- Urban Decay Primer Potion
- NYX Jumbo Eye Pencil in Milk
Close ups
Saturday, August 3, 2013
Sunset Makeup Tutorial
Hey guys! Today I am doing a Sunset makeup tutorial inspired by the sunsets at the beach! So let's get started. All the products used will be listed at the end.
First start with a clean face. All I have on is moisturizer.
Foundation
Concealer (LOVE this step. Makes acne seem like it was never there)
Blush, bronzer, and highlighter
Now onto the eyes. First step is to prime with a white eyeshadow pencil because you want your colors to pop!
Then add your orange color to your lid. Well, mine is kind of a dark, burnt orange.
Then I blended a dark purple.
Then I added black liner to my upper lash line and waterline. And then mascara.
And then add a sheer peach lipcolor (or a bright one!) and you're done!
Thanks for reading!
Face products
Eye and Lip Products
Eyeshadow (The ones I used are in the green boxes)
First start with a clean face. All I have on is moisturizer.
Foundation
Concealer (LOVE this step. Makes acne seem like it was never there)
Blush, bronzer, and highlighter
Now onto the eyes. First step is to prime with a white eyeshadow pencil because you want your colors to pop!
Then add your orange color to your lid. Well, mine is kind of a dark, burnt orange.
Then I blended a dark purple.
Then I added black liner to my upper lash line and waterline. And then mascara.
And then add a sheer peach lipcolor (or a bright one!) and you're done!
Thanks for reading!
Face products
- Catrice Defining Blush in Love & Peach
- Too Faced Milk Chocolate Soleil
- Maybelline Dream Matte Powder in Sand
- MAC Mineralized Skin Finish in Soft and Gentle
- Ulta Matte Finish Mousse Foundation in Light Ivory
- Hard Candy Glamoflauge in Medium/Light
- Sonia Kashuk Small Stippling Brush - No. 124
- Ecotools Angled Brush
- Arbonne Facial Application Brush
- Smashbox Brush in No. 1
Eye and Lip Products
- Maybelline Gel Liner in Espresso
- Maybelline The Falsies Flared Mascara
- NYX Jumbo Eye Pencil in Milk
- Urban Decay 24/7 Glide On Eye Pencil in Perversion
- Tarte Eyeliner Brush
- Arbonne Eye Shadow Brush
- Revlon Lip Butter in Juicy Papaya
Eyeshadow (The ones I used are in the green boxes)
Labels:
arbonne,
beach,
Catrice,
eyeshadow,
Hard Candy,
mac,
makeup,
Maybelline,
nyx,
orange,
purple,
Revlon,
Sonia Kashuk,
sunset,
Tarte,
Too Faced,
tutorial,
Ulta,
Urban Decay
Subscribe to:
Posts (Atom)