Showing posts with label tutorial. Show all posts

Wednesday, February 11, 2015

Silver and Red Valentines Makeup Tutorial

Hey guys! Today I'm doing a tutorial on the look I am wearing today. You can wear this for Valentines Day or any other special occasion. I will list every product on my face at the end, so let's get started!

First start by priming your eye with an eye primer.


Then add a medium matte brown eyeshadow to the crease and blend upwards. This will act as a transition shade and will help our other shadows blend easier.


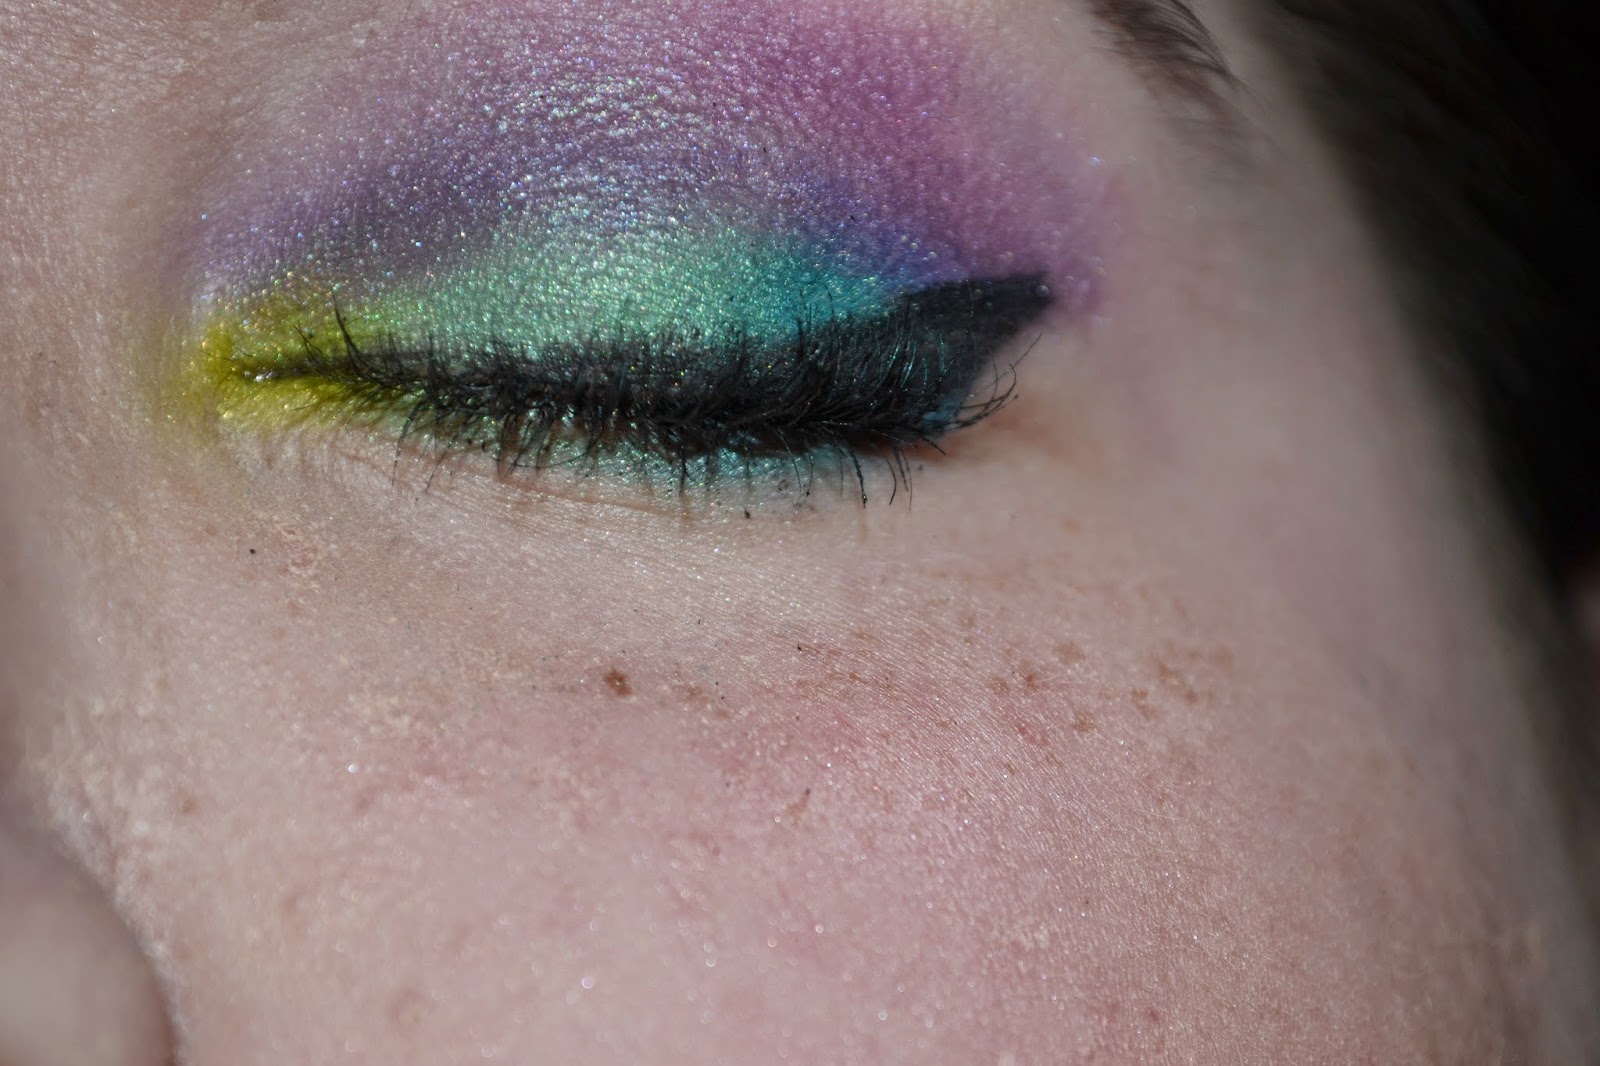
Then add a shimmery black in the crease and blend sideways. Try not to blend upwards or downwards. This will create a very soft cut crease.


Next add a very shimmery silver eyeshadow. I used MAC Fix + to give this shadow a but of a foiled effect.


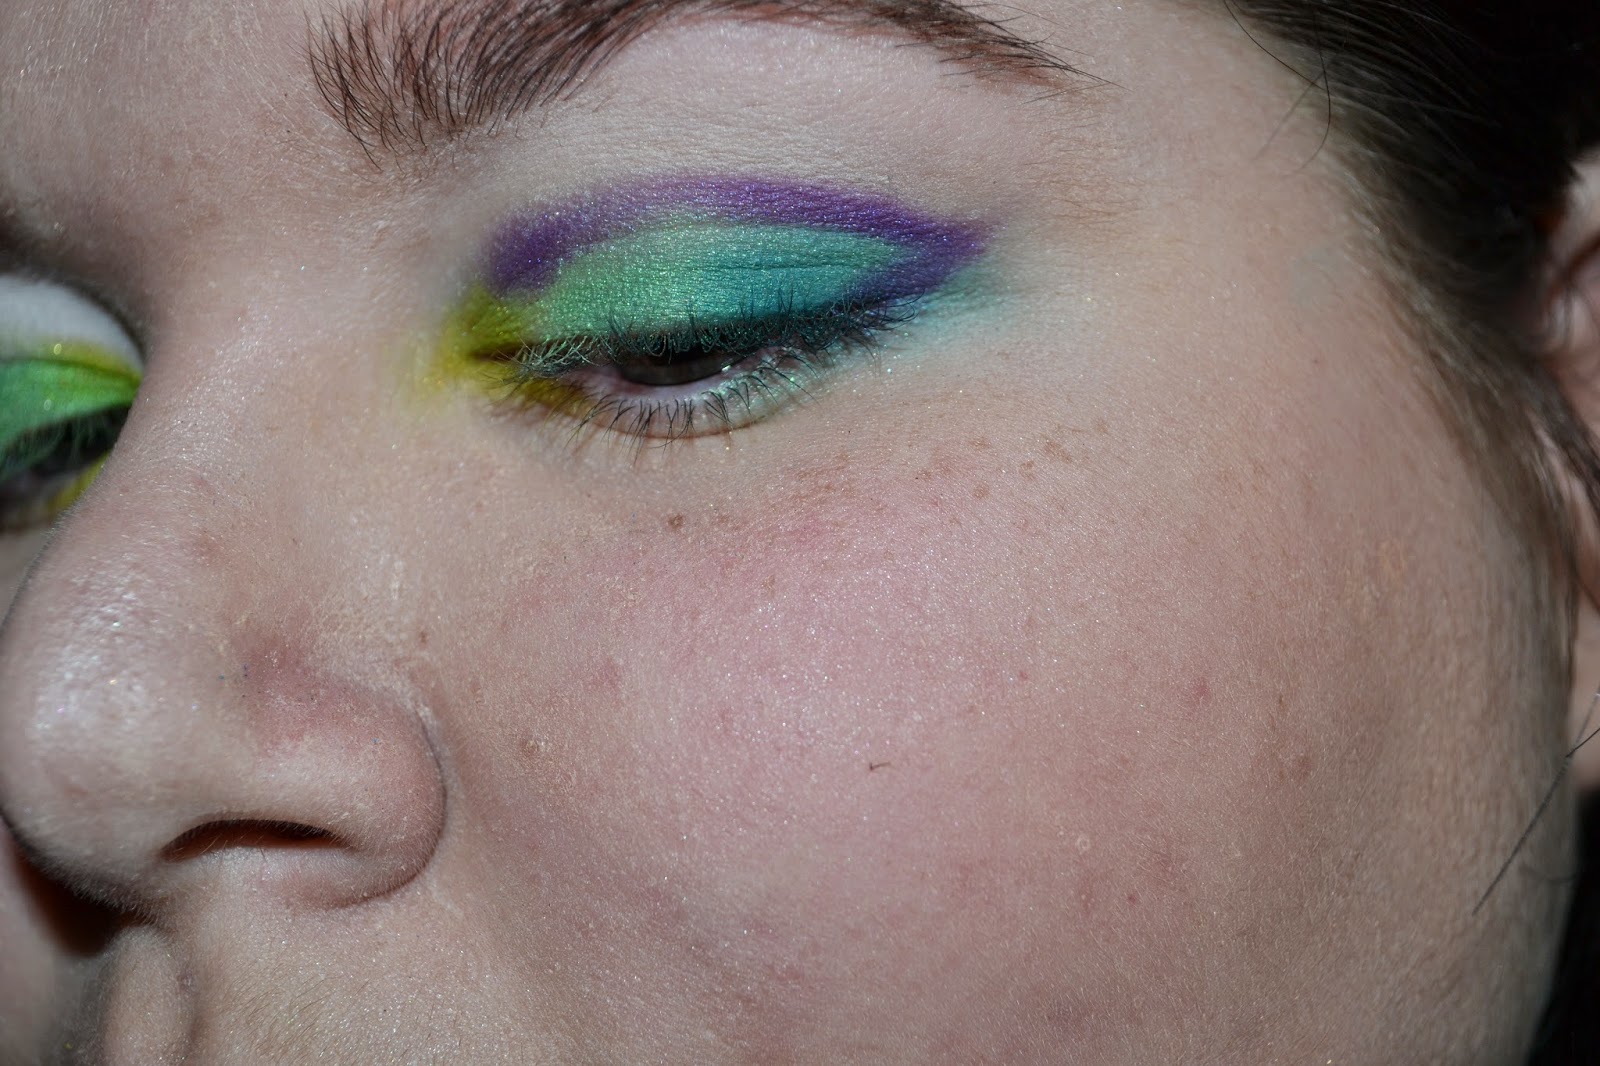
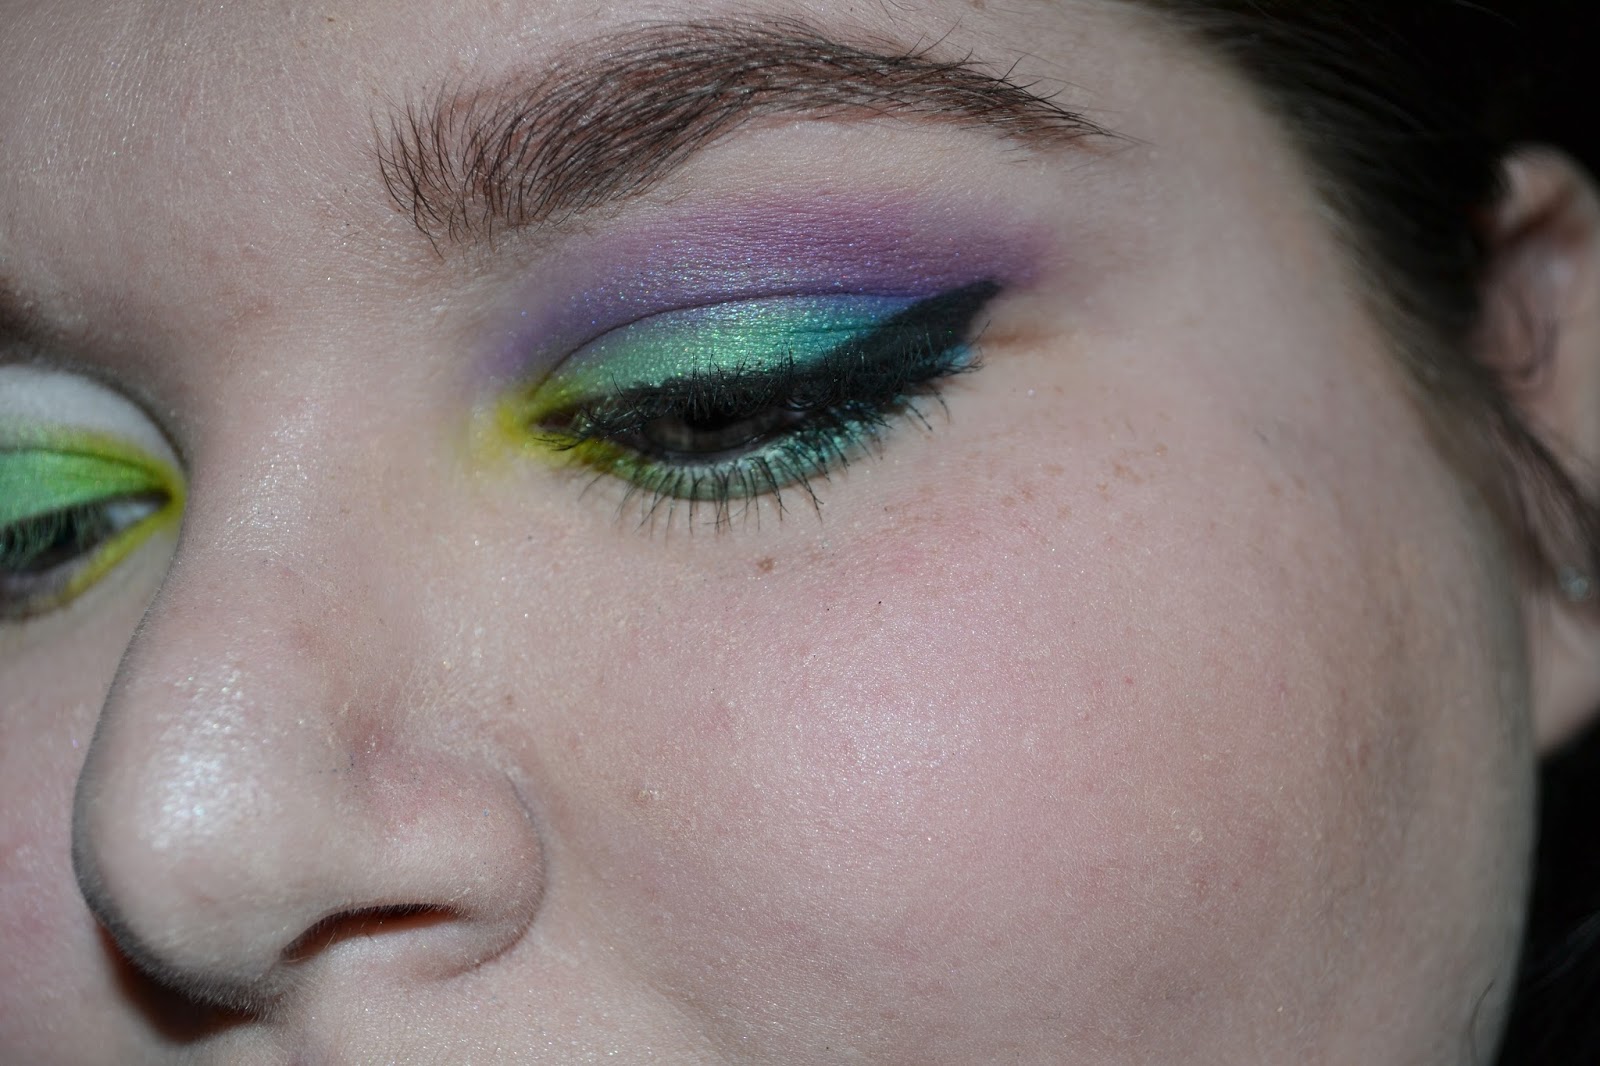
Then add a light, very shimmery, white to the inner corner. Next put on some thick black liquid eyeliner.


Next add pencil black eyeliner to your water line and smudge in into your lower lash line. Also add some of the silver the very bottom on the black liner on the bottom lash line.


Then add mascara and lashes if you want!


Finally add some red lipliner and red lipstick! I didn't like the lipstick I put on first so I layered a darker one over it. Feel free to make it darker or lighter. I wish I went with an even darker red.


Thanks for reading!

PRODUCTS USED: (In order)

FACE:
Maybelline Baby Skin Instant Pore Eraser
Benefit Lemonade
Sephora 10H Wear Perfection Foundation - Medium 25
Hard Candy Glamoflauge Concealer - Medium/Light
Rimmel Stay Matte Powder - 011 Creamy Natural
Anastasia Contour Powder - Banana

BROWS:
Anastasia DipBrow - Brunette
Benefit Speed Brow

CHEEKS:
NARS Bronzer - Laguna
NARS Blush - Deep Throat
Benefit Girl Meets Pearl
NARS Blush - Miss Liberty

EYES:
MAC Paint Pot - Painterly
Urban Decay Eyeshadow - Buck
Urban Decay Eyeshadow - Creep
Urban Decay Eyeshadow - Revolt
theBalm eyeshadow - Sassy
Stila Stay All Day Liquid Eye Liner - Intense Black
Urban Decay Pencil Liner - Perversion
Covergirl Full Lash Bloom Mascara
Anastasia Contour Powder - Vanilla

LIPS:
Sephora Lip Liner - The Red
Hourglass Opaque Rough Liquid Lipstick - Icon
Too Faced Melted Liquid Lipstick - Melted Berry

Friday, October 24, 2014

Brown Smokey Eyeshadow Tutorial for Fall

Hey guys! I'm here for a quick smokey eye I've been doing a lot lately for the fall time. I'll list all the products used at the end. Let's get started!

First prime you eye and add a dark brown with golden shimmer.


Then blend a light matte brown around the crease to blend the color out.

Next I added a slightly darker brown, again with some golden shimmer in the crease.


Then add a gold right in the middle of your lid, and a light soft cream golden shade to your inner corner and browbone.


Finally I added a dark matte brown gel liner, mascara, and false lashes!


Thanks for reading this short tutorial! Happy holidays :)

FACE:
Smashbox Photo Finish Foundation Primer
Urban Decay Urban Defense Tinted Moisturizer - Bodyguard
Hard Candy Glamoflauge - Medium/Light
Revlon Nearly Naked Powder - Light
Anastasia Contour Powder - Banana

CHEEKS:
Buxom Hot Escapes Bronzer - Tahiti
NARS Blush - Orgasm
Benefit High Beam
Anastasia Contour Powder - Sand

BROWS:
Anastasia Dipbrow Pomade - Chocolate

EYES:
MAC Paint Pot - Painterly
Urban Decay Naked Palette - Smog, Darkhorse, Naked, Half Baked
MAC Pigment - Vanilla
Unknown brand of gel liner
Ardell Demi Wispies

Thursday, May 29, 2014

Urban Decay Electric Pressed Pigment Palette Eyeshadow Tutorial

Hey guys! It's been a while since I've done a tutorial, but the Electric palette from Urban Decay has inspired me again :) So let's stop the chit chat and get started! All the products I use will be listed as I go.

First start off with a clean eye and prime with an eyeshadow primer. I used Urban Decay Primer Potion. Then you want to use a white cream base to make these bright shadows pop. I used NYX Jumbo Eye Pencil in Milk.


Then I added Freak to the eyelid with a flat shader brush. Do not go above the crease with this color.


Next I added Thrash to the inner corner and blended it into Freak.


Next I added Gonzo to the outer third of my eye. This picture will be before I blended it.


And now taking a clean fluffy brush, I blended Gonzo in Freak and added color and blended over and over until I was happy with the saturation.


Then I took Urban on a small pencil brush and mapped out where I wanted the color and then I took another clean brush and blended it upward towards the browbone.


Taking that same blending brush, I picked up a little of Jilted and blended that into and a little above Urban.


Next on an angled brush I put fringe on the outer half of the lower lash line.


And then I took Freak and put it in the middle of the lower lash line blending it into Fringe and Freak.


After adding some final touches like gel liner on the upper lash line, mascara, and bright pink lipstick, you are done! Here are some pictures of the finished look.


Thanks for reading!

Monday, February 3, 2014

Sultry Valentines Day Eyeshadow Tutorial Using Naked 3 Palette

Hey guys! I'm here with a fun, night out, Valentines Day eyeshadow tutorial using the Urban Decay Naked 3 palette. I will list the products I used as I go, so let's get started!

First start with a clean eye and smooth on a dark purple cream eyeshadow. I used Maybelline Color Tattoo in Pomegranate Punk and my finger.


Next I added the color Factory all over my lid with a large flat shading brush.


Next, using a small precision brush, I created the shape I wanted for my outer corner/crease with the color Blackheart.


Then added color little by little I blended it in. Kind of like a soft cut crease.


To make my eye pop I picked up the shadow Dust on a small flat shader brush and sprayed it with MAC Fix Plus to make it almost metallic and I applied this to the very center on my eyelid.


I added the color Strange to my brow bone with a fluffy brush and then with an angled brush, I went back to the color Factory and smudged it under my lash line to the middle.


Finally I added Stila Stay All Day Liquid Eyeliner in Black to the top lash line and Benefit They're Real mascara and you're done!


Thanks for reading!

Wednesday, January 15, 2014

Dior Rosy Tan Eyeshadow Tutorial

Hey guys! I'm here today with a very simple, everyday eyeshadow tutorial using the Rosy Tan palette by Dior. I will list the products I use as I go, so let's get started!

First prime your eye. I used the matte light cream shadow from Revlon's Not Just Nudes quad.


Next I added the matte taupe/brown shade in the bottom right to my entire lid.


Then I blended the silvery taupe in the bottom left in my crease. I also wet my brush just a little bit to give the shadow more intensity.


Next I added the chocolate brown in the top left corner into the outer corner. And then with a clean brush I blended the outer shadows to soften the crease.


Then to give the look more sparkle, with a flat brush I took the shimmery pearl shadow in the middle and patted it in the middle of my lid. I also added with whatever was left on the brush, to my brow bone to highlight.


Finally add a thin line of black eyeliner and mascara and you are done!


Thanks for reading!

Friday, December 13, 2013

Urban Decay Naked3 Rosy Neutral Eyeshadow Tutorial

Hey guys! I'm here today with a rosy neutral eyeshadow tutorial using the Urban Decay Naked 3 palette. A.k.a - Best palette ever created. Let's get started.

First prime your eye. I used Sin from Urban Decay.


Then I added Buzz all over the lid.


And then blended Mugshot in the crease and Darkside in the outer corner. Blend blend blend.


Next I added Strange to my brow bone and in the inner corners to highlight and brighten everything up. And then I mixed Darkside and Mugshot and added them to the bottom lashline keeping very close to the lashes.


To finish I used a black gel liner on my upper lash line, a black pencil liner in my waterline, and added mascara. On my lips I'm wearing Burt's Bees Tinted Lipbalm in Pink Blossom.


Thanks for reading!

Saturday, December 7, 2013

Winter Wonderland Makeup Tutorial

Hey guys! I'm here today with a winter themed makeup tutorial. For me, this look was just for fun. I wouldn't wear it everyday, but I might for a party! So grab those frosty blue shadows shoved in the back of your makeup drawer and lets get started!

First, start off with a clean lid and add a sparkly white cream shadow to just the lid. I used Maybelline Color Tattoo in Too Cool.


Then add a white shadow over it. I used Sick of Swimmin' from the Ariel palette from Sephora because it is a white with a blue duochrome. It's gorgeous.


Next, blend a bright matte blue in the crease. I used a random blue color from my BH 88 Matte palette.


Then put a darker blue in the crease. I used Blue Lagoon from the Ariel palette. Make sure it's not too dark.


Then add your highlight to the brow bone and inner corner. I used a white glitter bomb shadow.


Next add black liner to the upper lashes and the darkest blue shade to the lower lashes. I used Maybelline Gel Liner and Blue Lagoon again.


Finally I added mascara and went over the black liner with a glitter liner. I used ELF Mascara and Startdust glitter liner.


Thanks for reading!