Hey guys! Long time, no see. Sorry about that, I was busy with school. But now it is summer and I am ready to get back into the groove of blogging. Today I am reviewing the Too Faced Chocolate Bar eyeshadow palette. I'm late to the party on this one, so I hope that's okay. This eyeshadow palette is full of brown neutral shades and a few purple toned ones also. I'll go through each shade individually but I want to give a brief overview. The actual palette is shaped into a chocolate bar and smells like a Hershey's chocolate bar when opened. It smells exactly like their chocolate bronzers, because both are made with cocoa. I think the eyeshadows overall are of nice quality, but nothing amazing. They have great pigmentation but are not buttery like LORAC eyeshadows. Some are on the dry side like Black Forrest Truffle. I think this is a great palette, and if you want to buy this for yourself, you can for $49 here.
Gilded Ganache - A dark brown with an antique gold shimmer. Great pigmentation, very soft.
White Chocolate - A matte beige, with yellow undertones. Is very similar to one of their popular shades called 'Heaven'. It's not very pigmented but makes for a great browbone highlight.
Milk Chocolate - A matte medium warm brown. Good pigmentation. A little stiff in the pan.
Black Forrest Truffle - Burgundy with gold shimmer. Like I said before, this one is dry and not as pigmented as it could be. Also, when swatched, the gold shimmer teems to disappear.
Triple Fudge - A matte dark warm brown. Very soft and great pigmentation. One of my favorites. Easy blendable.
Salted Caramel - A matte peachy orange with undertones of brown. Amazing color when swatched but very powdery.
Marzipan - A peachy rose gold metallic shadow. Great pigmentation. One of my favorites. Love patting this onto the center of the eyelid.
Semi-Sweet - A warm matte medium brown. It is dry and patchy. But it can be buildable.
Strawberry Bon Bon - A matte baby pink. Not very pigmented and stiff in the pan. I use it to blend out the other shades, not just a color by itself.
Candied Violet - A purple shadow with pink shimmer. Oh man do I hate this eyeshadow. When swatched, there is barely anything there. It's just dots of pink shimmer. Nothing like it looks in the pan.
Amaretto - A frosty dark brown with red sheen to it. This is a very buttery shadow with great pigmentation.
Hazelnut - A bronzy brown shimmery eyeshadow. Good pigment, but on the powdery side.
Creme Brulee - A very warm gold. Smooth and good pigmentation.
Haute Chocolate - A dark warm bronze with lots of gold shimmer. Amazing pigmentation and very smooth.
Cherry Cordial - A dark red with hints of purple and silver flecks. Very dry and when swatched, there's not a lot of pigment and fallout with the flecks of silver.
Champagne Truffle - A light pink shimmery eyeshadow. Almost on the frosty side. Very buttery, great pigmentation.
Thanks for reading!
Disclaimer - This product was not sent to me.
Just a southern girl blogging about her obsession. Contact info: Twitter - @mmaegantubbss Email - maegantubbs@gmail.com
Showing posts with label Too Faced. Show all posts
Saturday, May 30, 2015
Too Faced Chocolate Bar Review, Pictures, and Swatches
Saturday, September 27, 2014
Too Faced Melted Liquified Long Wear Lipstick Review, Swatches, and Pictures
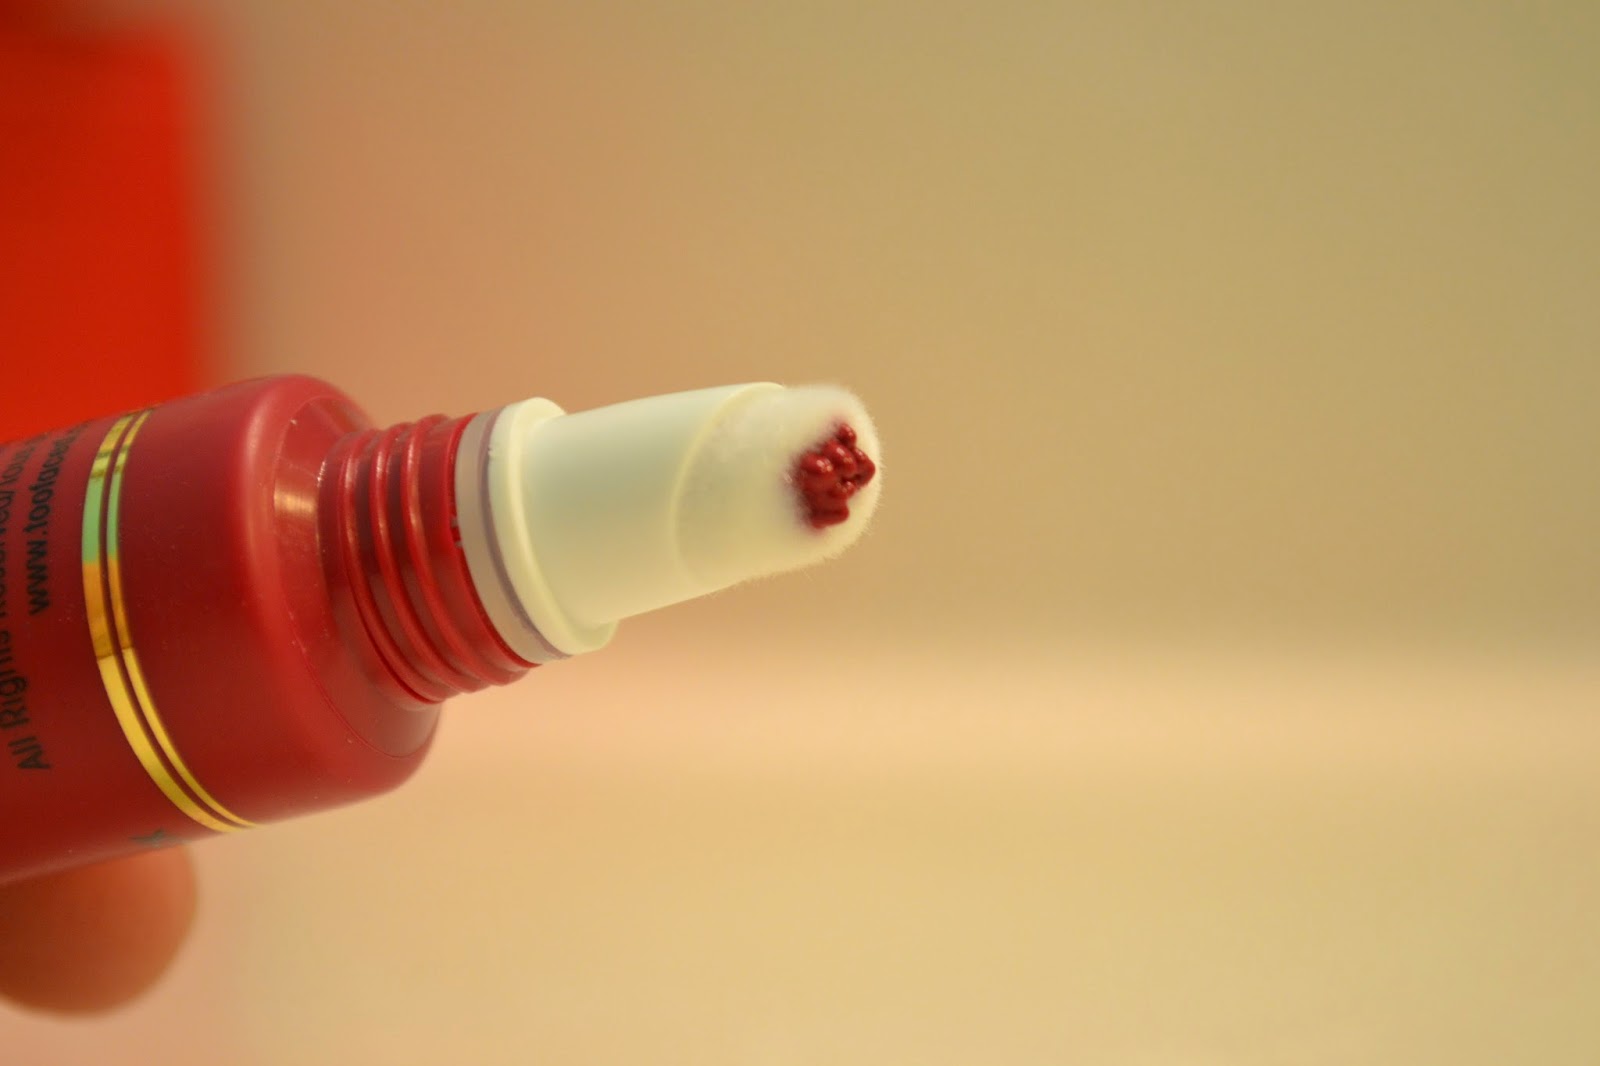
Hey guys! I'm here today to review Too Faced Liquid Lipstick in Melted Berry. This product comes in a squeeze tube with a doe foot applicator. When your squeeze the product out, it comes out of four tiny holes in the applicator. I really love that because its really hard to squeeze out too much. And the applicator is just the right size for applying it directly to your lips. The color is a deep berry red. I thought it would have a lot of purple undertones, but it barely does. It is mainly a very deep red. When you apply it, it barely budges. Even without a lip liner, it doesn't bleed all over your lips and barely fades. This stuff is awesome. I'm so glad I bought another one. If you would like to purchase this you can for $21 here.
Swatches and Pictures
Thanks for reading!
Disclaimer - This product was not sent to me.
Swatches and Pictures
Thanks for reading!
Disclaimer - This product was not sent to me.
Sunday, August 3, 2014
Too Faced Melted Liquified Long Wear Lipstick Review, Swatches, And Pictures
Hey guys! I'm here today to review Too Faced Melted Lipstick in Melted Violet. This product comes in a very nice 'squeezy tube' and the lipstick comes out of the top through little holes in a doe foot like applicatior and you can apply it directly to your lips from the applicator or you could use a lip brush. I find it really easy to get a precise edge just using the applicator, but it is easy to use a lip brush also. But with this packaging, I feel like once the product stops coming out and you think it is empty, there is still product in the tube. The color is a bright magenta and orchid color. It doesn't feel like most matte lipsticks do, it is very smooth and creamy but dries completely matte. The color lasts forever. Very long staying power. And when you take it off, it stains your lips. But it's not super hard to get it off, you just have to use makeup remover. It's super opaque and very pigmented. I cannot wait to get ALL of the colors. There are only 9 other colors but they are all equally beautiful. If you would like to purchase this product, you can for $21 here.
Thanks for reading!
Disclaimer - This product was not sent to me for review.
Thanks for reading!
Disclaimer - This product was not sent to me for review.
Monday, February 3, 2014
Sultry Valentines Day Eyeshadow Tutorial Using Naked 3 Palette
Hey guys! I'm here with a fun, night out, Valentines Day eyeshadow tutorial using the Urban Decay Naked 3 palette. I will list the products I used as I go, so let's get started!
First start with a clean eye and smooth on a dark purple cream eyeshadow. I used Maybelline Color Tattoo in Pomegranate Punk and my finger.
Next I added the color Factory all over my lid with a large flat shading brush.
Next, using a small precision brush, I created the shape I wanted for my outer corner/crease with the color Blackheart.
Then added color little by little I blended it in. Kind of like a soft cut crease.
To make my eye pop I picked up the shadow Dust on a small flat shader brush and sprayed it with MAC Fix Plus to make it almost metallic and I applied this to the very center on my eyelid.
I added the color Strange to my brow bone with a fluffy brush and then with an angled brush, I went back to the color Factory and smudged it under my lash line to the middle.
Finally I added Stila Stay All Day Liquid Eyeliner in Black to the top lash line and Benefit They're Real mascara and you're done!
Thanks for reading!
Labels:
benefit,
day,
eyeshadow,
makeup,
Maybelline,
naked 3,
palette,
sephora,
stila,
sultry,
Too Faced,
tutorial,
Urban Decay,
valentines
Saturday, December 21, 2013
My Eyebrow Routine
Hey guys! Today I'm here with a tutorial on how I do my eyebrows. I'll mention the products throughout the tutorial so keep an eye out for those. Always remember that eyebrows are sisters, not twins. Let's get started!
P.S. I'm wearing eyeshadows from the Naked 3 palette, so if you want a tutorial on them, let me know in the comments!
First start with a clean brow (duh) and I fill in the first little part of my brow (you can see where I stop) with a lighter color than my brows really are and make sure the lines are nice and sharp. I used Make Up For Ever Aqua Brow in 15 and an angled liner brush.
Then I fill in the brow to the arch with a dark powder. I make sure the lines are straight and pretty, then I blend with the first part of my brow. I used Sexpresso from the Too Faced Natural Eye palette and the same angled brush.
Next is pretty simple. I just fill in the 'tail' part of my brow with the same dark brown shadow and brush.
Finally I set it with a brow gel. I used Elf Wet Gloss.
Thanks for reading!
Sunday, December 8, 2013
Products I've Hit Pan On
Hey guys! I'm here today to show you what products I've hit pan on. Let's jump right in!
Benefit Boi-ing Concealer
This was in the Boi-ing and Lemonade duo at Ulta, and I immediately fell in love with this concealer. What's left in the pan is dry :(
Maybelline Dream Matte Powder
I loveeee this powder. It cracked and shattered into a million pieces so I pressed it and then hit pan on it again. Which is awesome. I need to buy a new one.
Maybelline Gel Liner
This is an awesome gel liner for the price but I bought a Tarte liner and it is so much better.
NARS Powder Foundation
This foundation has amazing coverage and is worth the price. It came with a sponge to apply it with, which I used into oblivion, so now I use a dense powder brush from Bare Minerals. I like the sponge better.
Neutrogena Natural Radiance Bronzer
I love this bronzer. It has the perfect amount of shimmer to warm up my face. It is a bit too light to contour with though.
C. O. Bigelow Rose Salve
I'm not sure if this really counts but I'm adding it anyway.It's okay. I don't love products that you stick your finger in.
Sonia Kashuk Concealer Palette
I freaking love this thing. It matches me perfectly. I need to get another one soon.
Too Faced Milk Chocolate Soleil Bronzer
This is my second one and I need to purchase a third! It is perfect to contour my pale face and smells like hot chocolate. I can't ask for more.
\\
Too Faced Natural Eye Palette
Ahh, what fond memories. This was my second eyeshadow palette. Ever. It's not old, I promise haha. But seriously, why can't Too Faced sell single eyeshadows??
Thanks for reading!
Monday, September 2, 2013
2 Looks, 1 Palette - Too Faced Natural Eye
Hey guys! I'm here with a 2 looks, 1 palette eyeshadow tutorial using Too Faced Natual Eye Palette. I love doing these because there are endless looks you can do with any eyeshadow. When you see the pictures of the palette, you can tell I ADORE this palette. I honestly use at least one shadow out of it every day. It is definitely a staple in my collection. If you would like to purchase it, you can do that here. Now onto the fun part!
First look - Start off with a clean eyelid and prime with a eyelid primer. I used Urban Decay Primer Potion. Then put Honey Pot all over the lid.
Then blend Cocoa Puff in the crease with a fluffy brush.
Then use a small precision brush and put Sexpresso in the outer V to give the crease some depth. And blend away!
Lastly, add some liquid liner to the top lash line and mascara. And you're done with look #1!
Second look - Start with a clean eye and add eyelid primer. I then added Heaven all over the lid. It doesn't look like anything is on but it's important to have a nice clean base.
Then I mixed Silk Teddy and Push-Up with a large fluffy brush and blended it in the crease.
Next I lightly put Erotica in the outer V.
This next part doesn't really show up in pictures but I took Nude Beach with a flat shader brush and packed it on lid. This shade has so much fall out and gritty glitter that it is so hard to work with. In real life, the lid looks more sparkly than it does on camera. Then I lined my upper lash line with Urban Decay's eyeliner in Lust, and then went back over that with a black pencil liner because I was a bit too purple. Lastly add mascara and you are done!
Palette used -
Thanks for reading!
Disclaimer - This product was not sent to me. I purchased with my own money (a long time ago).
First look - Start off with a clean eyelid and prime with a eyelid primer. I used Urban Decay Primer Potion. Then put Honey Pot all over the lid.
Then blend Cocoa Puff in the crease with a fluffy brush.
Then use a small precision brush and put Sexpresso in the outer V to give the crease some depth. And blend away!
Lastly, add some liquid liner to the top lash line and mascara. And you're done with look #1!
Second look - Start with a clean eye and add eyelid primer. I then added Heaven all over the lid. It doesn't look like anything is on but it's important to have a nice clean base.
Then I mixed Silk Teddy and Push-Up with a large fluffy brush and blended it in the crease.
Next I lightly put Erotica in the outer V.
This next part doesn't really show up in pictures but I took Nude Beach with a flat shader brush and packed it on lid. This shade has so much fall out and gritty glitter that it is so hard to work with. In real life, the lid looks more sparkly than it does on camera. Then I lined my upper lash line with Urban Decay's eyeliner in Lust, and then went back over that with a black pencil liner because I was a bit too purple. Lastly add mascara and you are done!
Palette used -
poor thing
Thanks for reading!
Disclaimer - This product was not sent to me. I purchased with my own money (a long time ago).
Subscribe to:
Posts (Atom)


